How to Accept/Reject Registered Users on wAnywhere Application?
Step 1: This document will explain the steps to Approve/Reject registered users on the console.
Step 2: Super Admin/Admin can Approve/Reject the newly registered users in the organization.
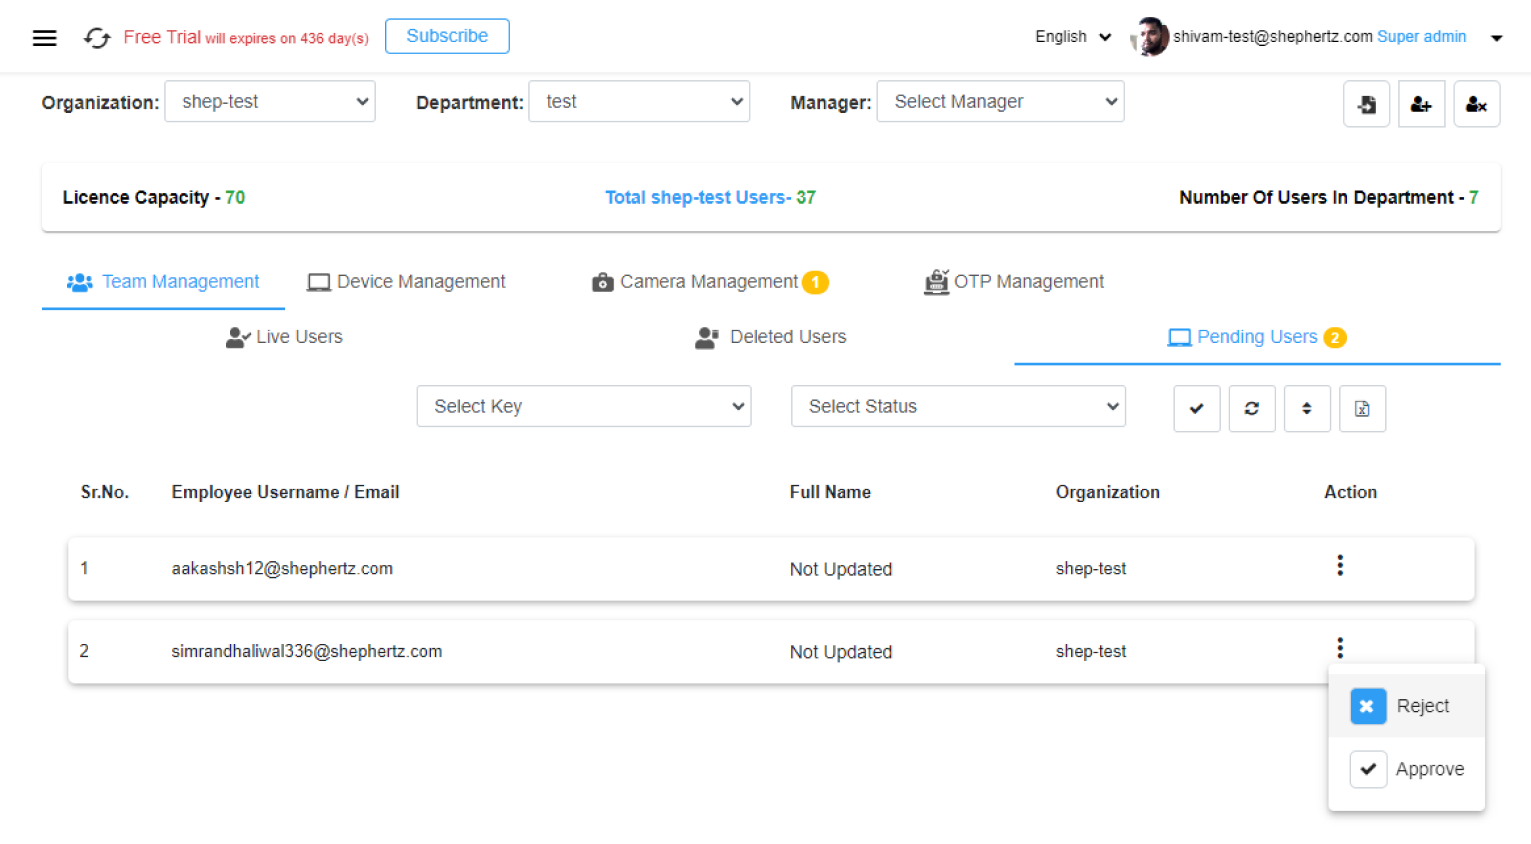
Step 3: Go to ‘User Mgmt’ and find the registered users in the ‘Pending Users’ tab.
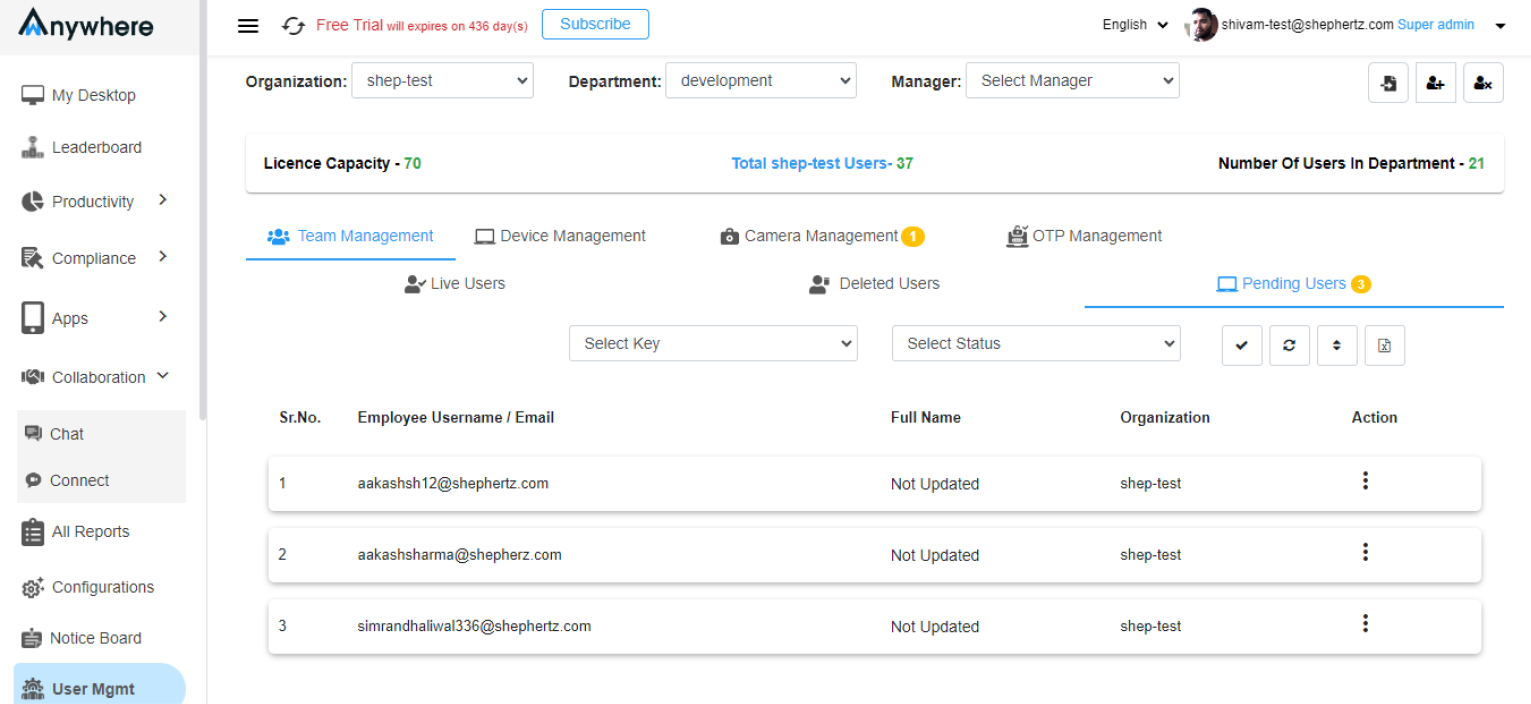
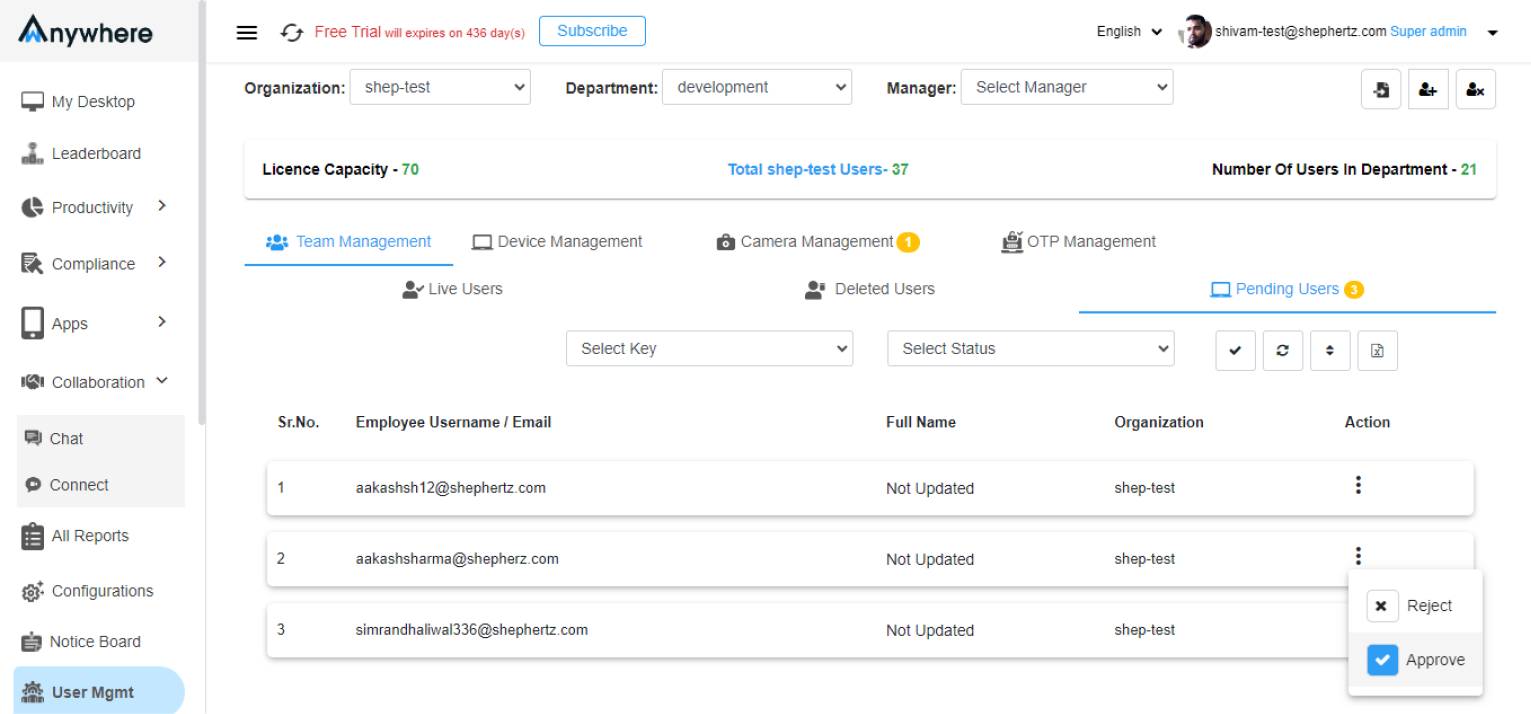
Step 4: Choose from the options to ‘Approve’ or ‘Reject’ the registered users.
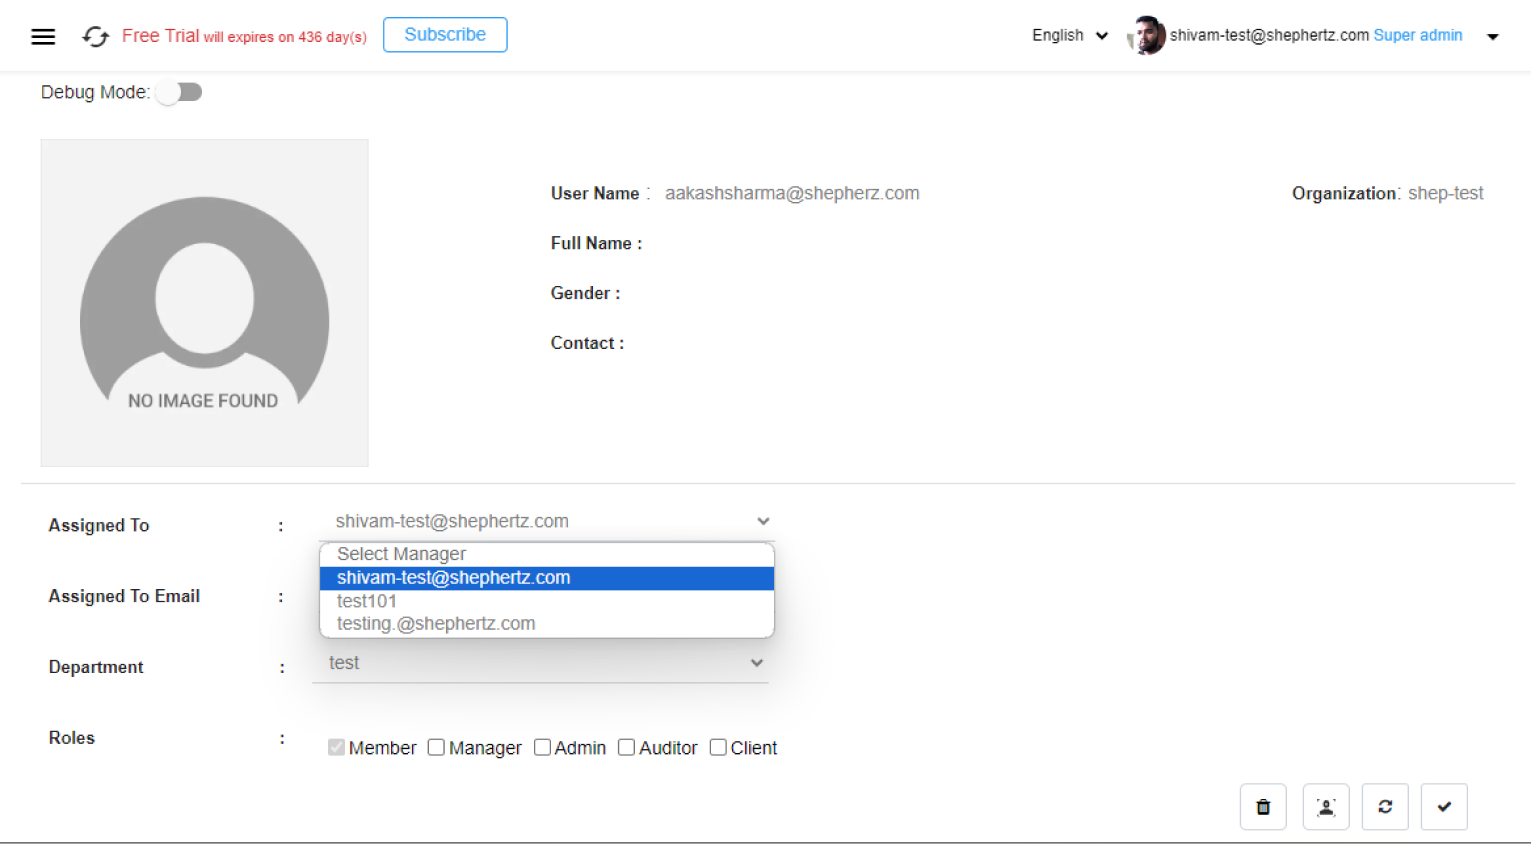
Step 5: Clicking on the ‘Approve’ button, the page will redirect to the Edit Profile page of the newly registered user.
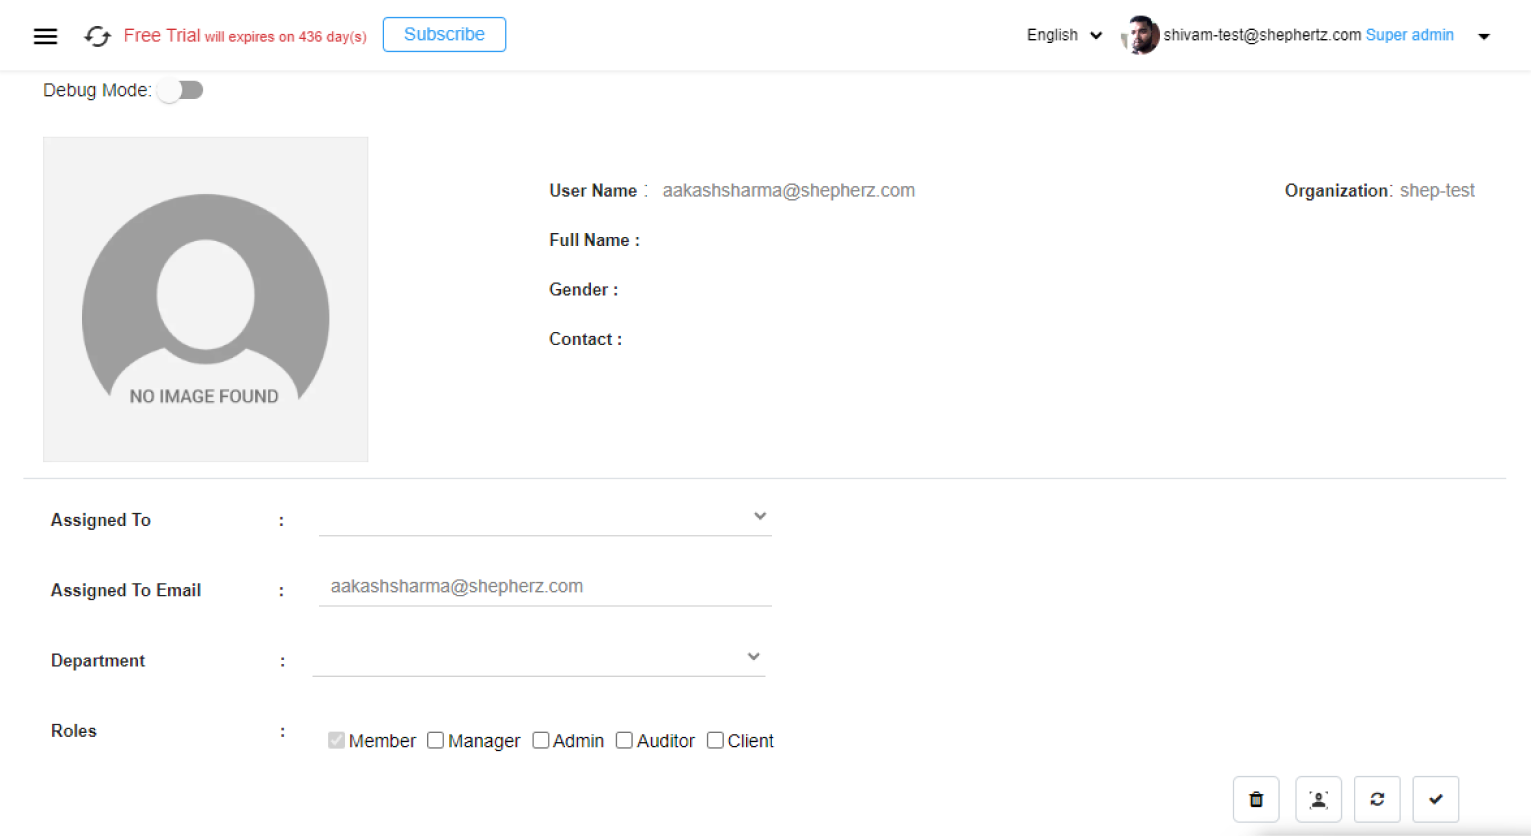
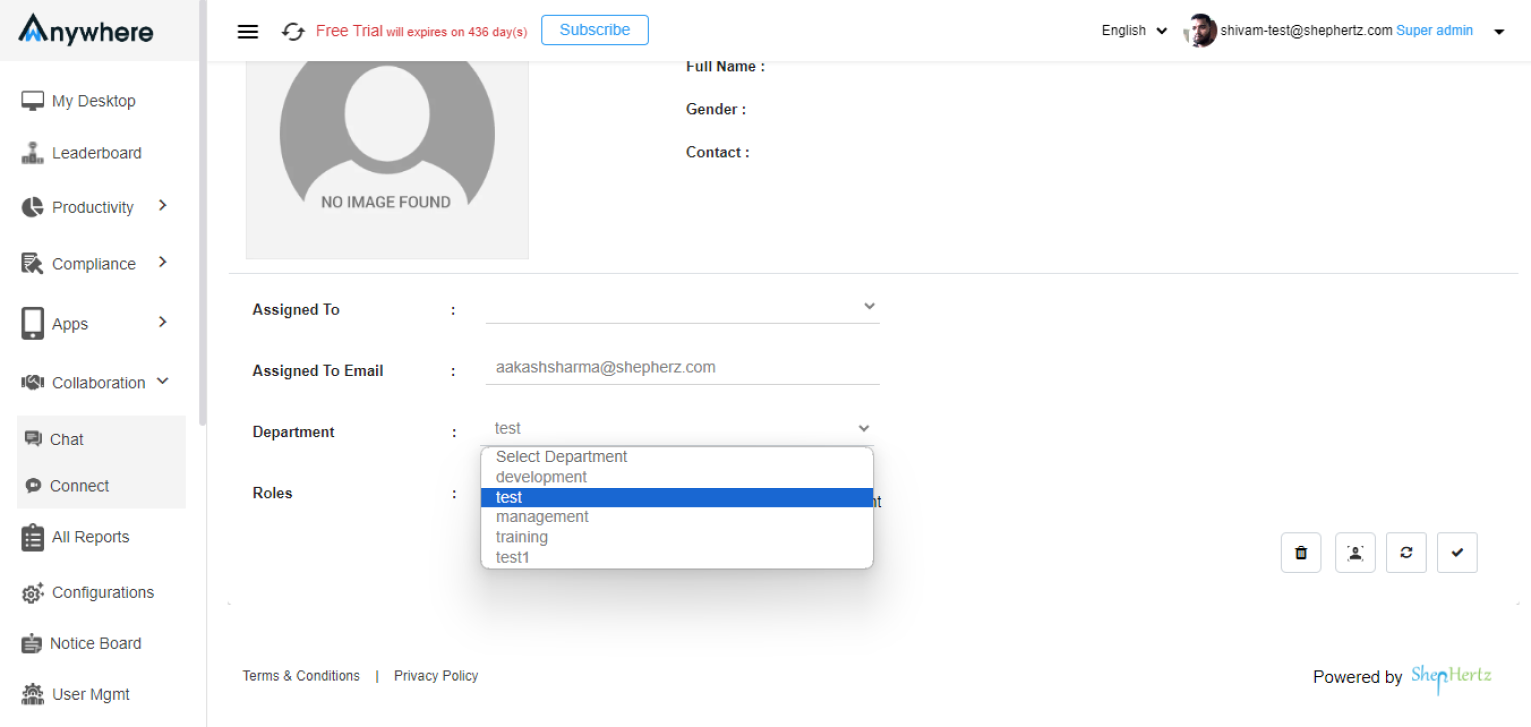
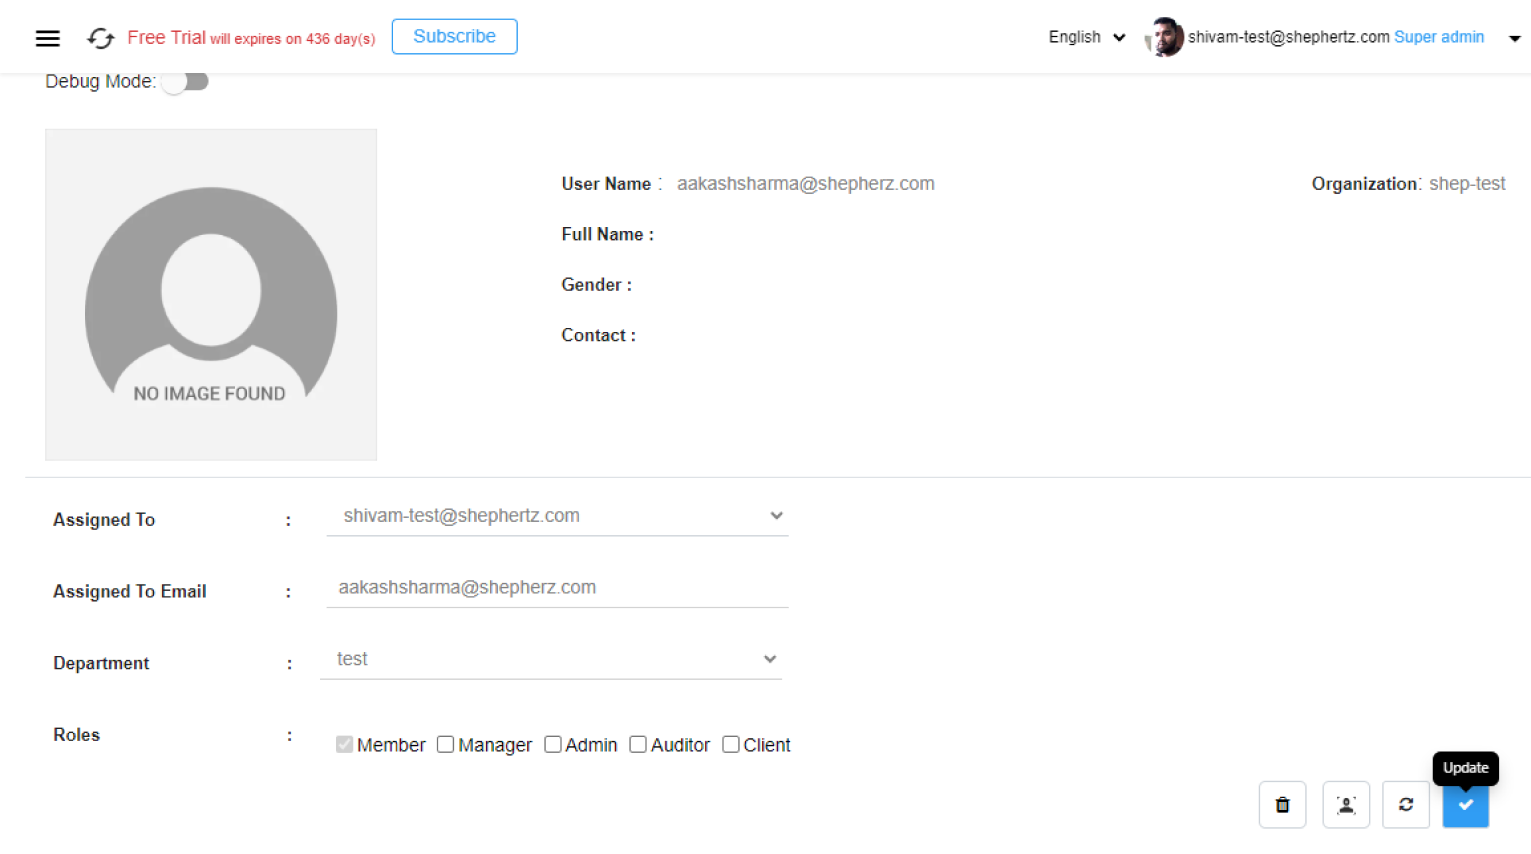
Step 6: Here, Super Admin/Admin can assign User’s Manager in the ‘Assigned To’ dropdown, add the email in the ‘Assigned to Email’ section, allocate ‘Department’ in the dropdown and assign ‘Roles’ by checking box for the available roles.
Step 7: After approval of the user by Super Admin/Admin and not assigning any role through the ‘Roles’ option, the user will be considered as a ‘Member’.
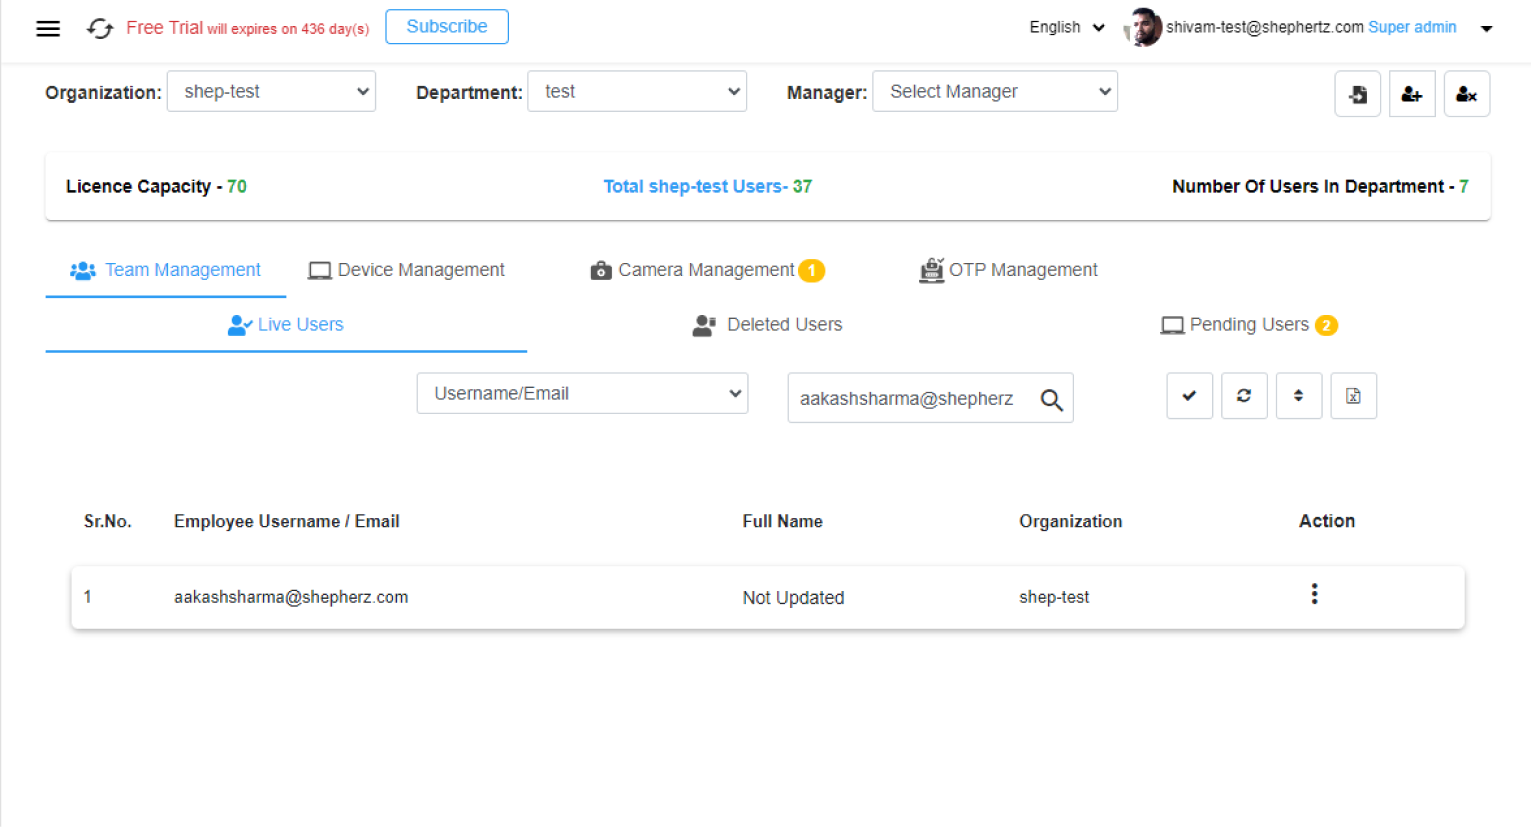
Step 8: After updating the profile, the registered user will move from ‘Pending Users’ tab to ‘Live Users’ tab.
Step 9: Super Admin/Admin can remove Users from the Console by simply rejecting the request by clicking the ‘Reject’ button.
Step 10: Only ‘Approved’ users can login into the Agent Application.

